
It all started when I had a beautiful skein of yarn and didn’t know what to do with it. Naturally, I looked on Ravelry to get inspiration—I love that they provide the option to search for projects by yarn—and came across the lovely Not Your Ordinary Market Bag crochet pattern.
Version One: Crochet
The pattern designer, Marsha, makes excellent observations about what goes into a good market bag pattern, and I was sold. (The pattern was free, so it wasn’t a hard sale!) I figured it would be easy: it’s almost entirely made of chain-9s and pairs of single crochets.
And it was easy, except… it turns out my attention span for repetitive chaining is about… four. I was constantly losing track and having to count my chains. This was fine for the first couple of rows, but I was starting to regret my life choices by the middle. It also didn’t help that I sized up and didn’t swatch, but thanks to the gathering, this is an incredibly forgiving pattern.
I followed the instructions, mostly, for the handles. I don’t like sewing crochet closed so I crocheted the handles to themselves, which looks… “creative.” By the time I was done, I’d sworn off this kind of chaining forever (or at least until I forget, whichever comes first). I went around ranting, “It doesn’t make sense to spend all your time creating a string by chaining when you can just buy string!”
But that got me thinking…
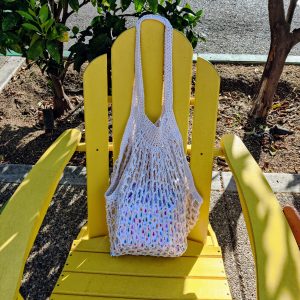
This pattern basically calls for a square, which you then gather and put handles around. There’s no reason I couldn’t use the basic technique with a different craft or a different stitch.
As my mom says, anything worth doing is worth overdoing, so I set about overdoing with a will.
Version Two: Also Crochet
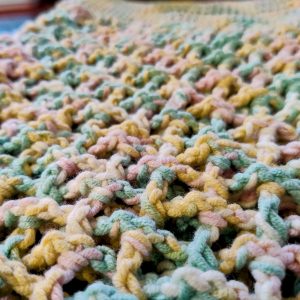
I stuck with crochet, but instead of relying primarily on chains, I used a combination of ch-4 and double crochets with a bigger hook (size N). The result was less delicate than the original but also much faster with far fewer recounts.
I gave this one to a friend for her birthday, with some fabric-gift-bag–wrapped gifts inside. Only two bags in and my husband was already loudly questioning just how many market bags we needed!
Version Three: Knit
Originally version two was going to be knit, but I was visiting my parents in the boonies for the week, and wanted to try knitting it on huge needles to see if it would make the loose mesh I was envisioning, without extra stitches. I hadn’t brought any knitting needles with me, let alone huge ones, but my parents have a forest on their property and my dad has a shop with things like a hatchet and sandpaper in various grits, so…
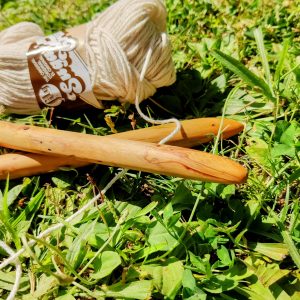
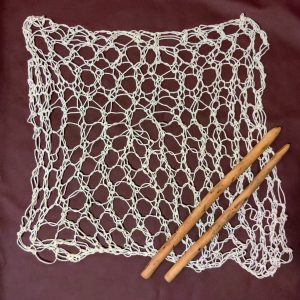
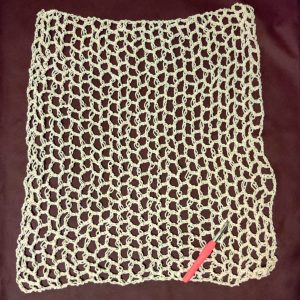
It took a little while to actually make the needles, so version two became version three. I tried to follow a basic k2tog yo pattern but obviously got it wrong in spots, and learned that—at least for that pattern—the holes were two or three times larger than the needles. This bag worked great for taking a change of clothes to the beach, but I wouldn’t trust it with anything smaller than big onions.
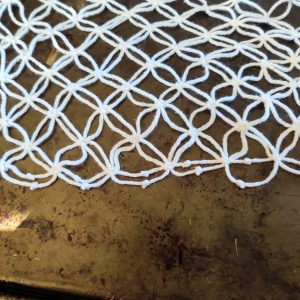
Version Four: Macrame
I’ve done one macrame project so that’s clearly a reason to give it a go here, right?! I wish I’d taken a progress photo; I did quite a bit of it on a road trip by taping it to the dashboard (I was a passenger!). When we got to our destination, I transferred its tapey self to a cookie sheet to make it portable.
Not having much macrame experience, I didn’t realize that there’s really not any common way of tying off ends. When I watched various YouTube videos about making macrame market bags, it turned out there are basically three approaches to the ends:
- Embrace the fringe! Sometimes it was gathered and sometimes it was left loose, but a lot of bags just keep it.
- Hide the fringe. A number of bags called for knotting the fringe together at the bottom, trimming to a reasonable length, and then turning the bag inside out, so the little ends were on the inside of the bag. That works for a denser bag, but not for one with open mesh like this one.
- Work from the bottom up and turn the fringe into handles. I thought this was very clever, but wanted to keep to the make-a-square-and-add-handles approach I used for the other crafts, just for comparison’s sake.
Because I knew I’d be crocheting over this part, I used “magic knots” to create a straight edge with no dangling yarn. It’s lumpy and would be unsuitable for a lot of contexts, but once I gathered and covered it, it was unnoticeable.
Version Five: Tunisian Crochet Variation
I came across the concept of Tunisian crochet right before our trip and ran out to see if I could find a hook. There was one size at Michaels, so that’s what I got and used.
Since I’d never done Tunisian crochet before, I thought I should start with a pattern designed for it rather than fudging it like I was with everything else. I went with the Haekelgold Tunisian Crochet Market Bag pattern, largely because I figured I’d need the video to help me figure out the new motions. I also used a different yarn because it called to me from the shelves when I was buying the hook. 😉
I didn’t always get the over-under pattern right, but I was happy with the result for a first try, and it made me brave enough to try bringing back what I learned to the main pattern.
Version Six: Tunisian Crochet
I didn’t just try the same approach but decided I wanted to turn it 45º to make it into a diagonal mesh. It took some futzing but it worked!
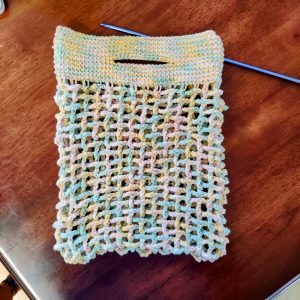
Version Seven: Knit Again
Given how absolutely giant the gaps were when I used the huge knitting needles, I thought maybe I should try the pattern again with more moderate-sized needles. That’s what I’m working on now (and what’s in the not-a-market-bag in the photo at the top). I’m thinking I might sew on fabric handles instead of crocheting. We’ll see.
Version Eight: Netting?
I saw a video that made netting seem like a plausible approach. Again, we’ll see.
Leave a Reply